# Jenga - 基于Swift ResultBuilder优雅的构建UITableView
[](LICENSE)


[](https://swift.org/package-manager/)
[](https://cocoapods.org)
该框架允许您使用 UIKit 构建 Table 视图,其语法类似于 SwiftUI。 您可以将其视为改进的 `UITableView`。
## 特性
- [x] 使用声明式链式语法构建列表 流畅的编码体验 优雅自然的样式设置.
- [x] 丰富的 Cell 类型支持,支持系统设置样式和自定义类型。
- [x] 支持@propertyWrapper,使用`state`和`binding`绑定UI状态
- [x] 支持自动计算行高
- [x] 支持自动注册Cell
- [x] 更多新特性的不断加入.
## 截屏
## 安装
#### CocoaPods - Podfile
```ruby
pod 'Jenga'
```
#### [Swift Package Manager for Apple platforms](https://developer.apple.com/documentation/xcode/adding_package_dependencies_to_your_app)
选择 Xcode 菜单 `File > Swift Packages > Add Package Dependency` 输入仓库地址.
```
Repository: https://github.com/fanglinwei/Jenga
```
#### [Swift Package Manager](https://swift.org/package-manager/)
将以下内容添加到你的 `Package.swift`:
```swift
.package(url: "https://github.com/fanglinwei/Jenga.git", from: "version")
```
## 使用
首先导入
```swift
import Jenga
```
初始化
```swift
JengaEnvironment.isEnabledLog = true //日志
JengaEnvironment.setup(JengaProvider())
```
然后你只需要简短的代码就可以构建UITableView
```swift
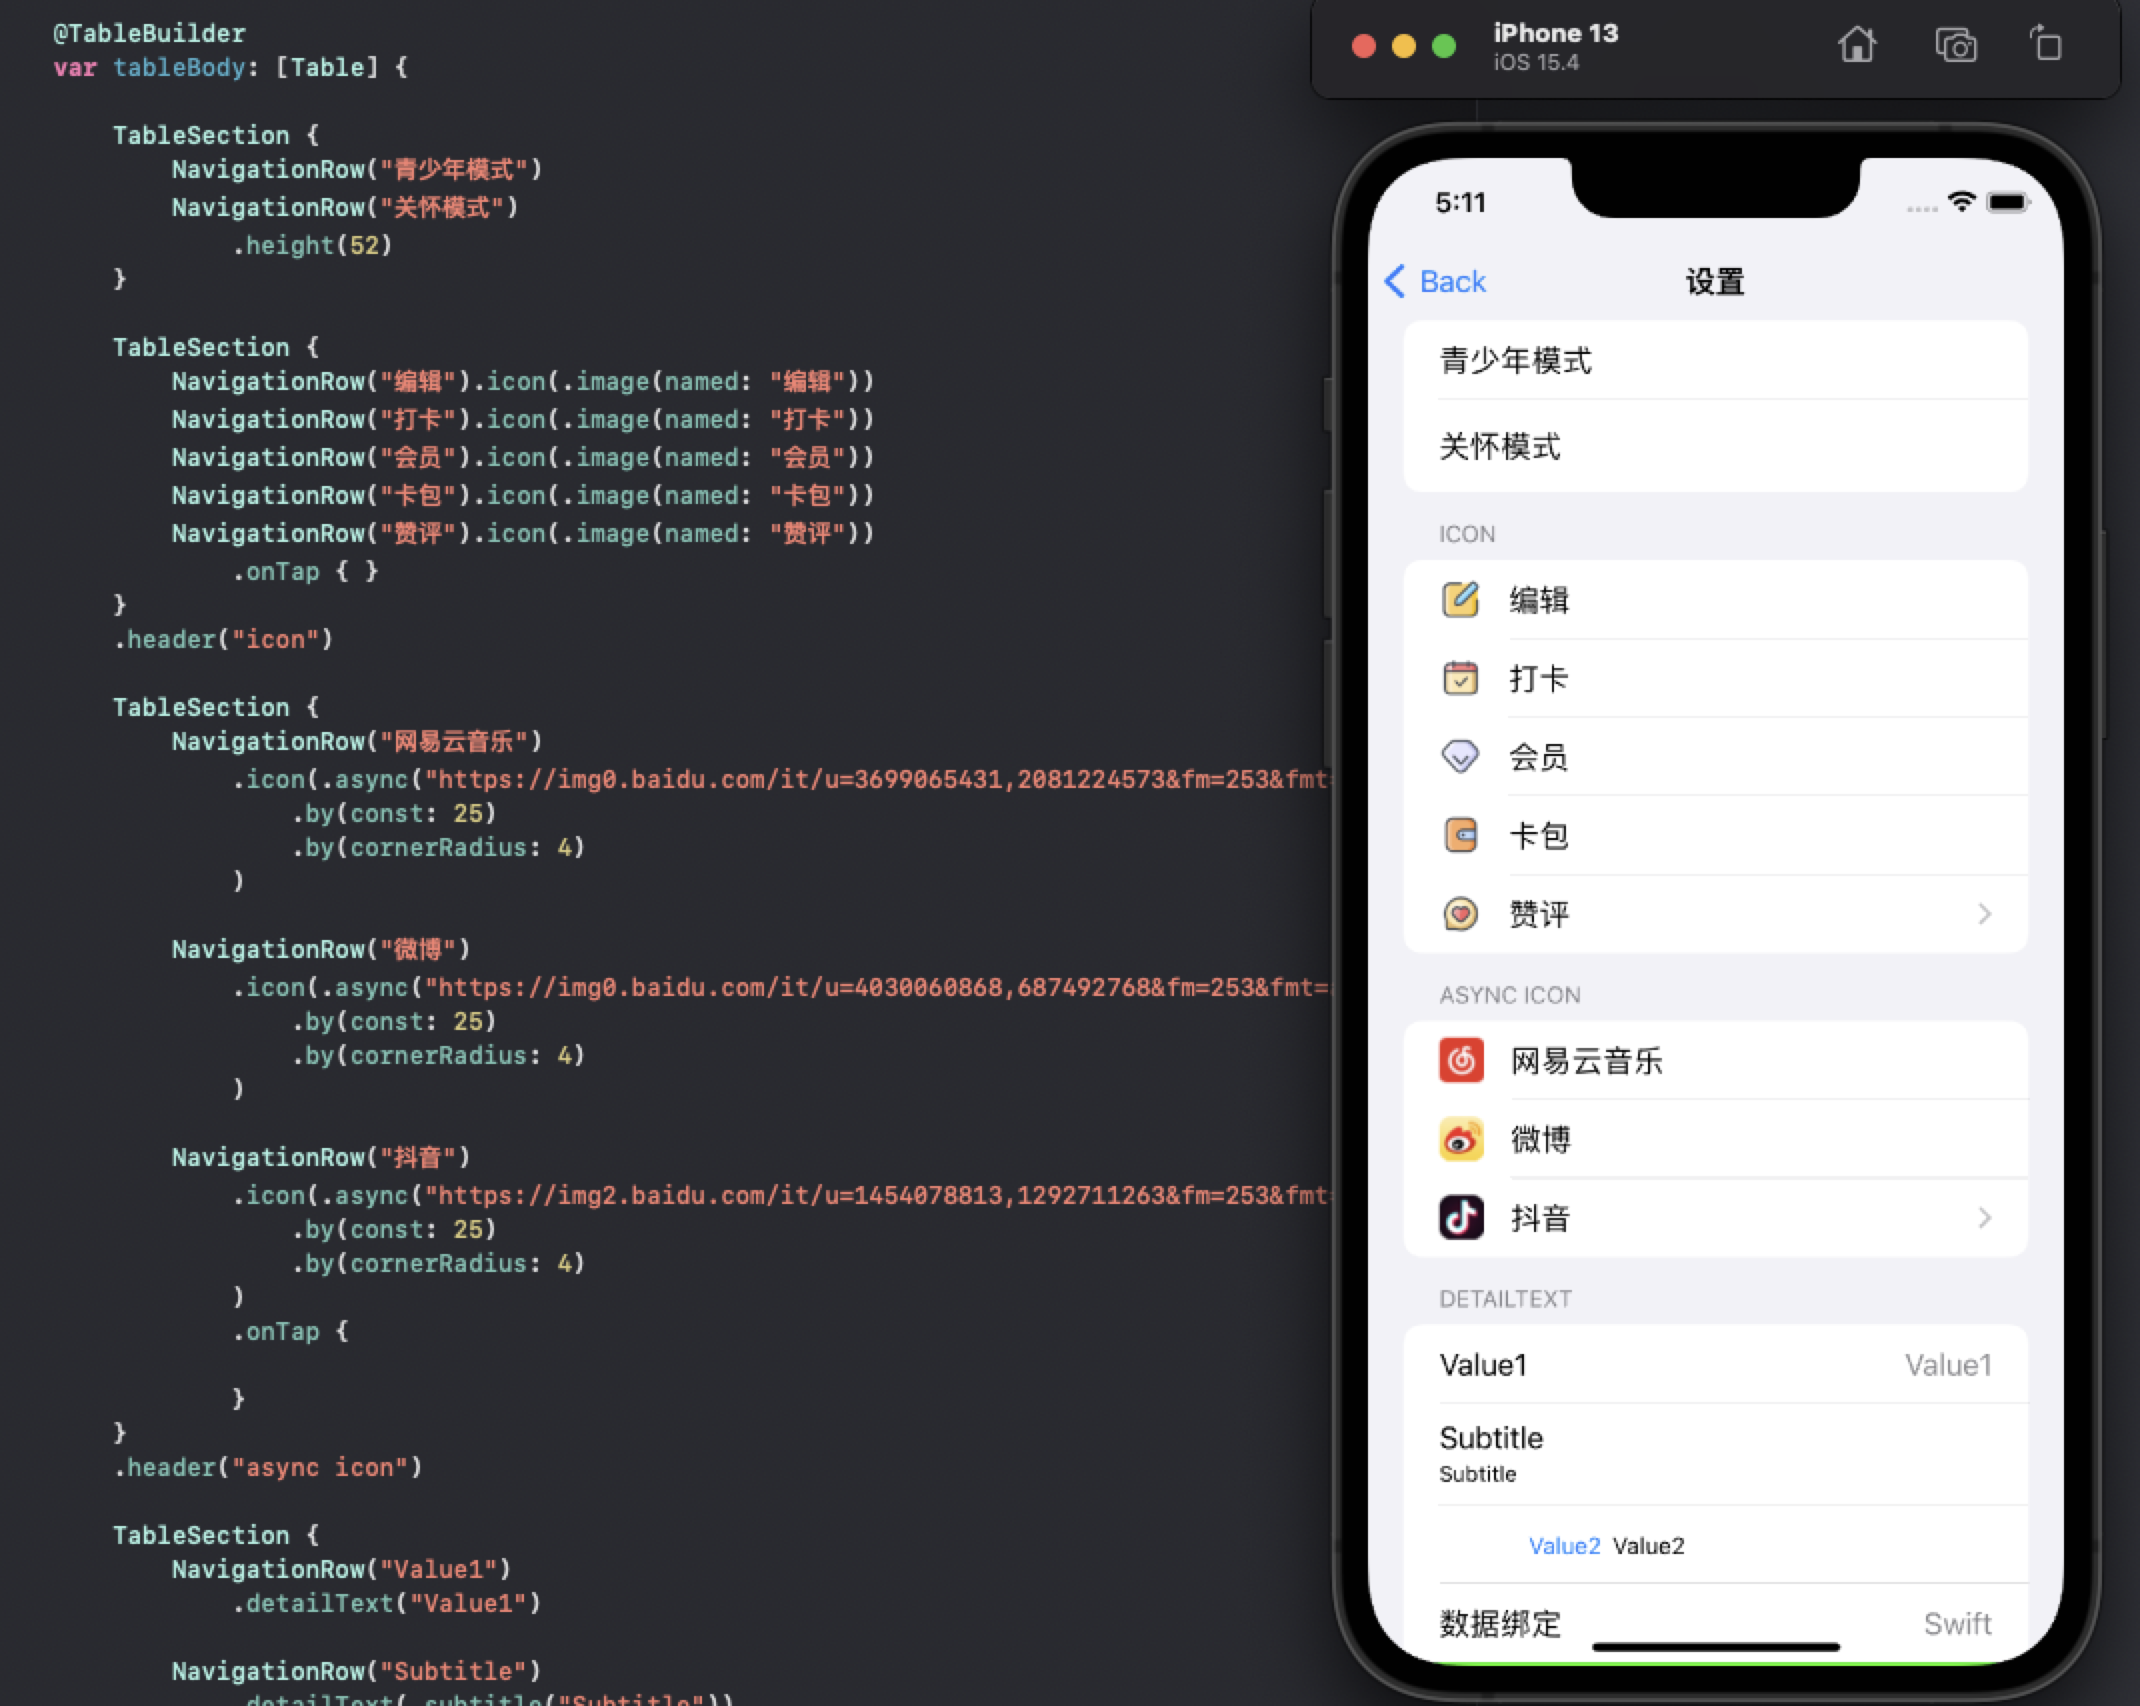
@TableBuilder
var tableBody: [Table] {
rows...
}
```
下面是一些简单示例. 支持所有设备和模拟器:
#### 推荐使用`DSLAutoTable`进行快速构建:
```swift
import Jenga
class ViewController: UIViewController, DSLAutoTable {
@TableBuilder
var tableBody: [Table] {
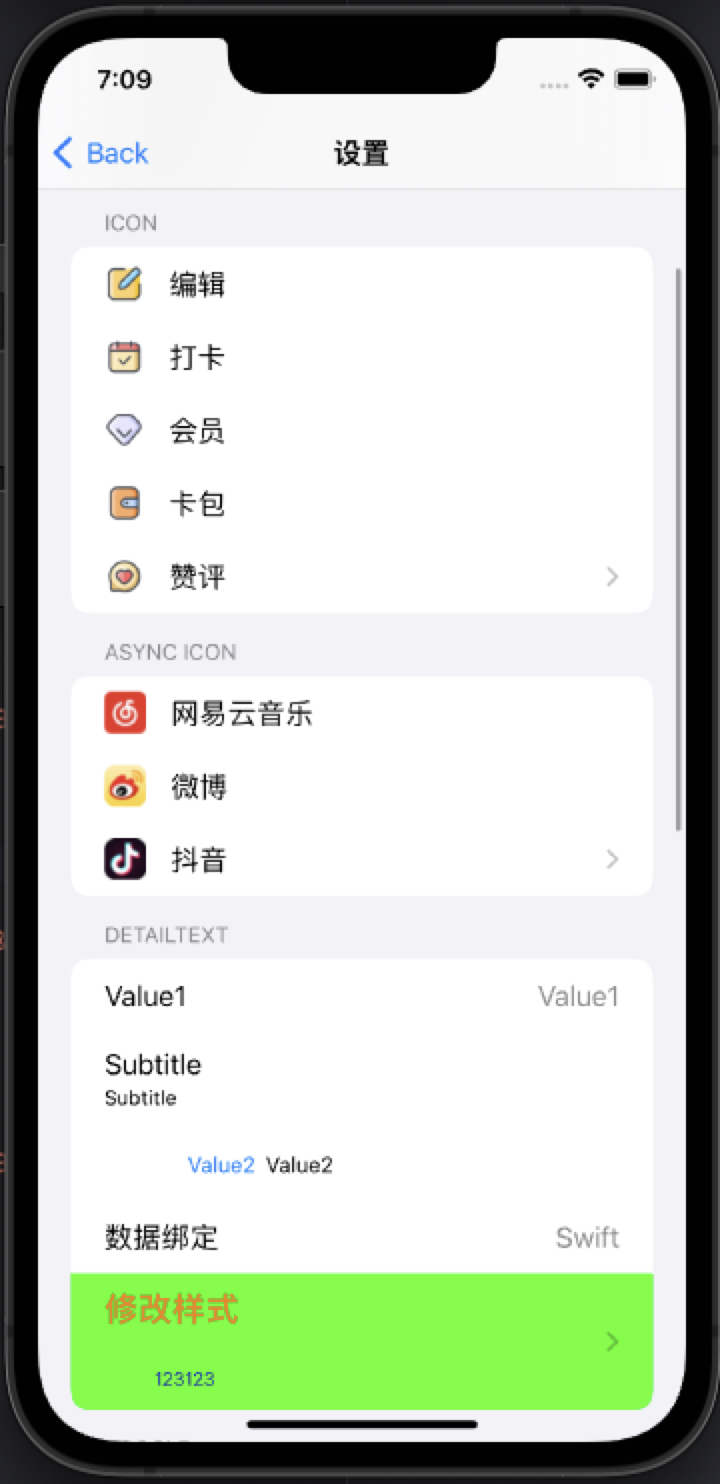
TableSection {
NavigationRow("设置样式")
.onTap(on: self) { (self) in
self.navigationController?.pushViewController(SettingViewController(), animated: true)
}
NavigationRow("自定义Cell")
.onTap(on: self) { (self) in
self.navigationController?.pushViewController(CustomViewController(), animated: true)
}
}
}
}
```
预览

#### 自定义Cell:
```swift
@TableBuilder
var tableBody: [Table] {
TableSection {
TableRow("image1")
.height(1184 / 2256 * (UIScreen.main.bounds.width - 32))
.customize { [weak self] cell in
cell.delegate = self
}
SpacerRow(10)
TableRow()
.height(1540 / 2078 * (UIScreen.main.bounds.width - 32))
.data("image2")
.customize { (cell, value) in
print(cell, value)
}
}
.headerHeight(20)
}
```
预览

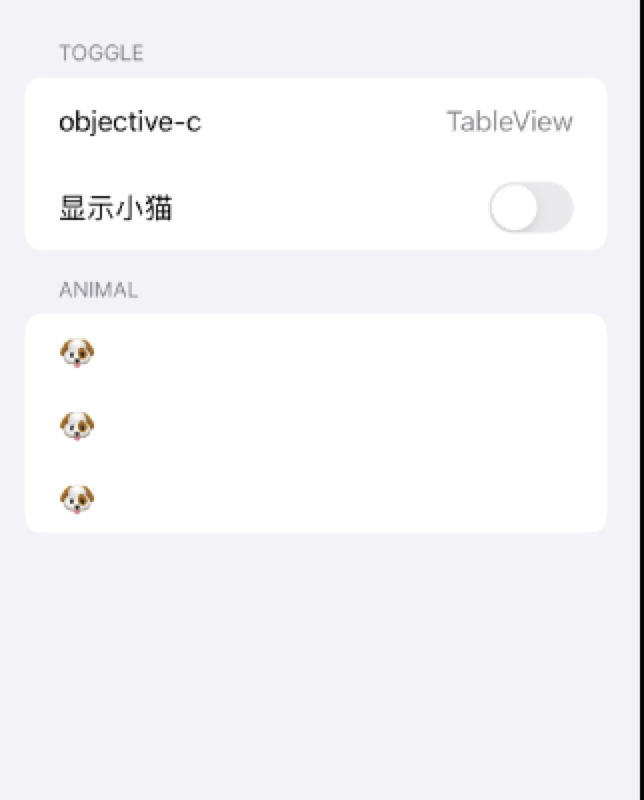
#### 状态以及绑定:
```swift
@State var text = "objective-c"
@State var detailText = "TableView"
@State var isHiddenCat = false
// DSL
@TableBuilder
var tableBody: [Table] {
TableSection {
NavigationRow($text)
.detailText($detailText)
ToggleRow("显示小猫", isOn: $isHiddenCat)
.onTap(on: self) { (self, isOn) in
self.isHiddenCat = isOn
}
}
.header("Toggle")
.rowHeight(52)
.headerHeight(.automaticDimension)
TableSection(binding: $isHiddenCat) { isOn in
NavigationRow("🐶")
NavigationRow("🐶")
NavigationRow("🐶")
if isOn {
NavigationRow("🐱")
NavigationRow("🐱")
NavigationRow("🐱")
}
}
.header("Animal")
.headerHeight(.automaticDimension)
}
```
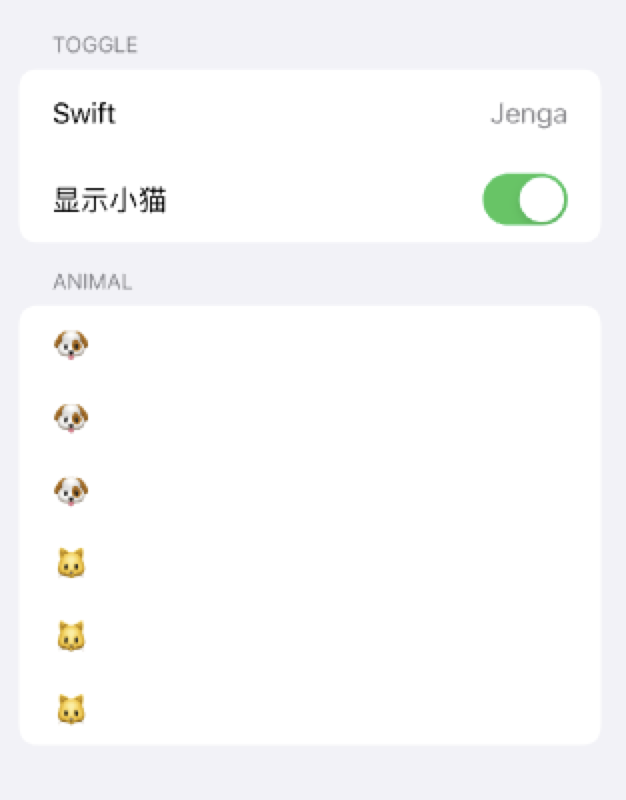
修改`State`更新UI:
```swift
text = "Swift"
detailText = "Jenga"
isShowCat = true
```
预览
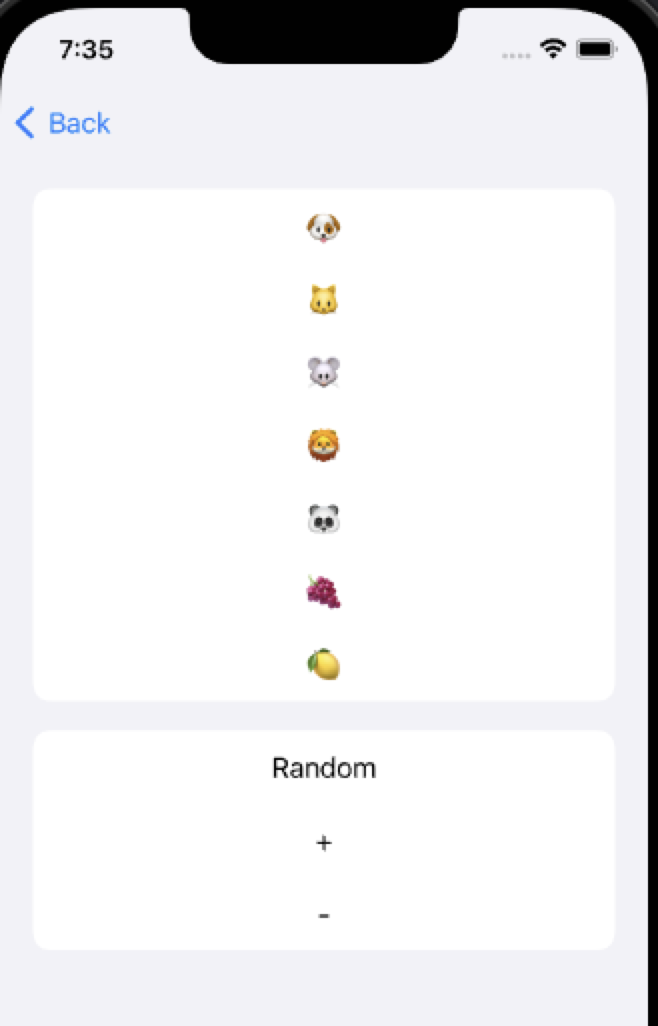
#### Section Binding:
```swift
@State var emojis: [String] = ["🐶", "🐱", "🐭", "🦁", "🐼"]
// DSL
@TableBuilder
var tableBody: [Table] {
TableSection(binding: $emojis) {
TableRow()
.data($0)
.height(44)
}
.headerHeight(.automaticDimension)
TableSection {
TapActionRow("Random")
.onTap(on: self) { (self) in
guard self.emojis.count > 3 else { return }
self.emojis[2] = randomEmojis[Int.random(in: 0 ... 4)]
self.emojis[3] = randomEmojis[Int.random(in: 0 ... 4)]
}
TapActionRow("+")
.onTap(on: self) { (self) in
self.emojis.append(randomEmojis[Int.random(in: 0 ... 4)])
}
TapActionRow("-")
.onTap(on: self) { (self) in
guard self.emojis.count > 0 else { return }
_ = self.emojis.popLast()
}
}
.headerHeight(.automaticDimension)
}
```
预览
#### 也可以不使用 TableSection,但我仍在权衡这种 API 方法的优缺点
```swift
@TableBuilder
var tableBody: [Table] {
TableHeader("我是头部")
NavigationRow("设置样式")
NavigationRow("自定义Cell")
NavigationRow("自定义TableView")
TableFooter("我是底部")
TableHeader("第二组")
.height(100)
NavigationRow("cell")
}
```
#### 自定义`DSLAutoTable`创建的`TableView`
```swift
struct JengaProvider: Jenga.JengaProvider {
func defaultTableView(with frame: CGRect) -> UITableView {
let tableView: UITableView
if #available(iOS 13.0, *) {
tableView = UITableView(frame: frame, style: .insetGrouped)
} else {
tableView = UITableView(frame: frame, style: .grouped)
}
return tableView
}
}
JengaEnvironment.setup(JengaProvider())
```
如果你想要监听`UIScrollViewDelegate`或者自行创建TableView, 可以不使用`DSLAutoTable`协议
在Demo中查看`CustomTableViewController`即可
1. ###### 创建 TableDirector
```swift
lazy var table = TableDirector(tableView, delegate: self)
```
2. ###### 使用TableBuilder描述Contents
```swift
@TableBuilder
var tableBody: [Table]] {
TableSection(binding: $array) {
TableRow()
.data($0)
.height(44)
}
.headerHeight(.automaticDimension)
}
```
3. ###### 更新TableBody
```swift
table.set(sections: tableBody)
```
好了 你的列表完成了
更多示例请查看工程应用.
#### 自动计算缓存行高:
实现思路来源于[FDTemplateLayoutCell](https://github.com/forkingdog/UITableView-FDTemplateLayoutCell)
你可以设置高度为`RowHeight.highAutomaticDimension`来开启自动计算并且缓存行高
在Demo中查看`AutoHeightViewController`即可
```swift
// row
NavigationRow()
.height(.highAutomaticDimension)
// section
TableSection {
rows...
}
.rowHeight(.highAutomaticDimension)
```
## `SystemRow`的协议提供链式
| Row | 描述 |
| :---------------------- | ------------------ |
| `text` | 标题 |
| `detailText` | 子标题(默认value1) |
| `detailText(.subtitle)` | 子标题subtitle |
| `detailText(.value1)` | 子标题value1 |
| `detailText(.value2)` | 子标题value2 |
| `detailText(.none)` | 子标题空样式 |
| `isOn` | 开关 |
| `height` | 行高 |
| `estimatedHeight` | 预估行高 |
| `selectionStyle` | 选中样式 |
| `onTap` | 点击事件 |
| `customize` | 自定义 |
## 贡献
如果您需要实现特定功能或遇到错误,请打开issue。
如果您自己扩展了Jenga的功能并希望其他人也使用它,请提交拉取请求。
## 思路来源
- [LazyFish](https://github.com/zjam9333/LazyFish)
- [QuickTableViewController](https://github.com/bcylin/QuickTableViewController)
- [TableKit](https://github.com/maxsokolov/TableKit)
- [FDTemplateLayoutCell](https://github.com/forkingdog/UITableView-FDTemplateLayoutCell)
## 协议
Jenga 使用 MIT 协议. 有关更多信息,请参阅[LICENSE](LICENSE)文件.